
There are lots of way to add contact form on a static page. Today i am going to share one of them form this method you can easily add a custom, stylish and spam free contact form in your blogger or any other website. In wordpress we can manage multiple forms using these two great plugins contact form 7 & Gravity forms. Now we are going to create a contact form for Blogger using Google docs where you can manage multiple forms. Believe; it’s a simple, powerful, spam free contact form for your blog and it has more options.You can add here you logo and banner too. I earlier time i used this method for make confession page for my Facebook page.
Benefits of Google docs contact form
- You can create many contact forms.
- You can view all your responses in a separate spreadsheet.
- Create and easily embed the contact form to any pages in your blog.
- You can add radio buttons, check boxes and list in contact form.
How to create contact form for Blogger
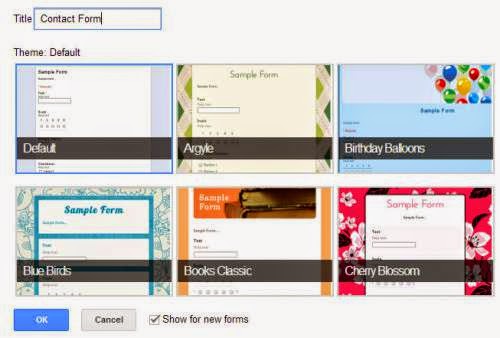
Go to https://drive.google.com/ and login using your Blogger account. Now at the top left corner click create form and you will see different templates to choose from. Better choose the default template and name the title as “Contact Form”.
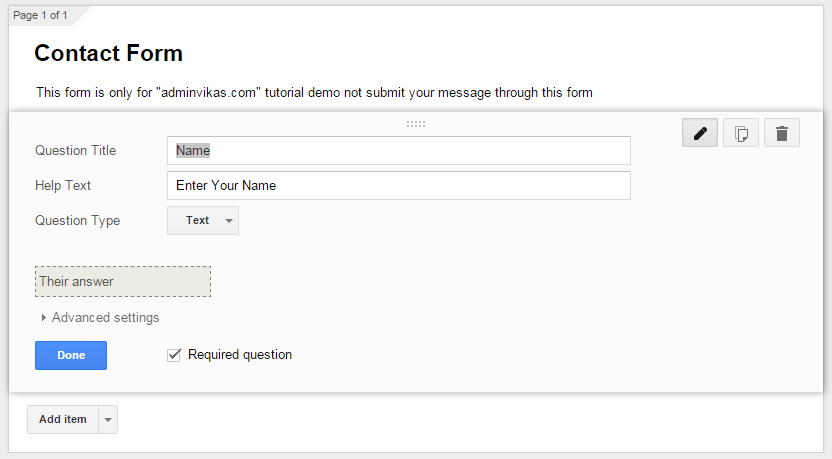
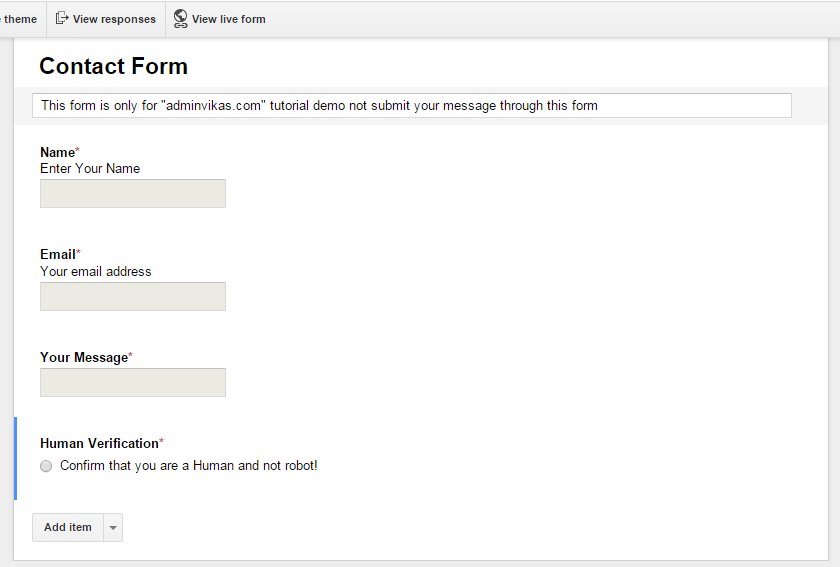
Now as of basic contact form you will have to create three fields that is name, email and message field. After selecting the template you will see three options that is question title, help text and question type.
Your NameNow to add a name field select “text” in question type and name the question title as “your name”. If you want to help your readers with more info then you can add help text. Now check this field as required question, so that users will not be able to leave a message with this field blank. Click done.
Your Email
You have just added the name field and to add an email field select “text” in question type. Now name the question title as “Your Email” and mark this question as required. This is an email field and so users have to only enter their email address and not a normal text. In order to force them to enter their email address just select date validation, text and email address as you see in the image.

If you wish to add phone number or URL field then the process is same what you did above. For number drop down date validation, select number and select greater or less than values. For URL value drop down date validation, select text and then select URL.
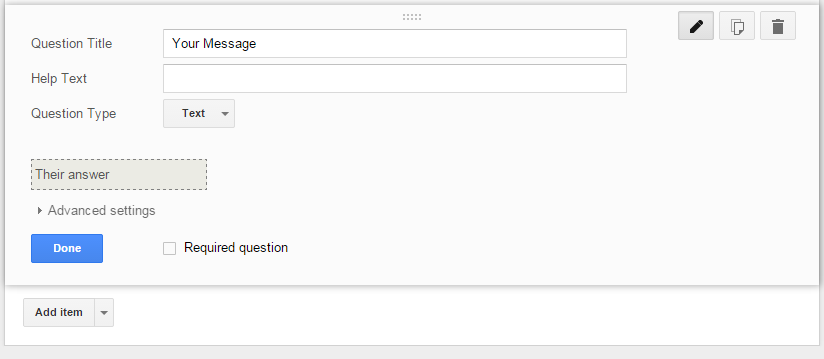
Your MessageNow for the message field select paragraph text, mark the field as required and name the field as “your message”.
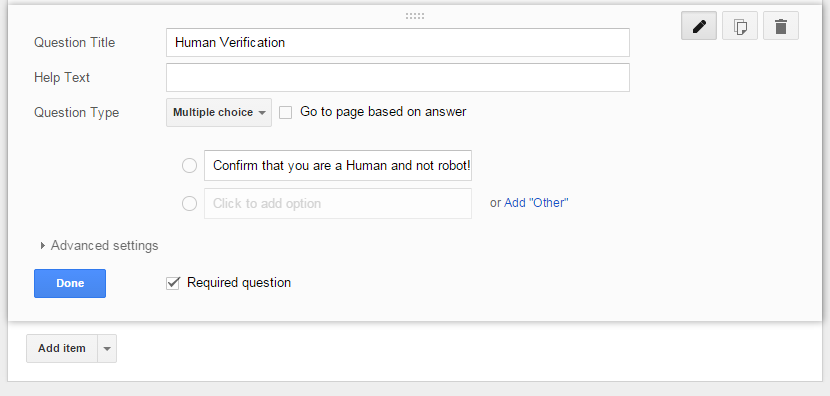
Additional Spam protection – Click Add item and select check box and mark it as required question and name it as “Human Verification”. In option field enter “Confirm that you are a Human and not robot!” and click done.
You have now created your contact form and to preview this click “view live form” at the top.
Confirmation Settings
You will have three options in confirmation page. You can allow users to submit another response. You can offer users to edit their response after submitting. You can show results of this form. Better choose none and click send form.

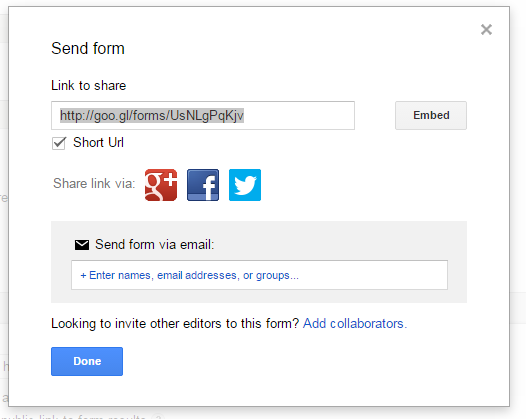
When you click send form a popup window opens, now click embed and grab the iFrame code. You can also short you url by clicking the check box “Short url”
How to create contact page in Blogger
Login to your Blogger dashboard and create a new page and name it as contact us page. If you wish, then add additional details to your visitors before the contact form and don’t fail to disable comments for that page. Now paste the embed code in HTML view and publish it.
Now you have a simple, yet powerful contact form in your Blogger contact page. Edit iFrame width and height to perfectly fit your blog.
Receiving responses from Blogger contact form
Go to Google Drive and you can see contact form (responses) for your contact form. Open it and you can see all the responses in spread sheet.
Now your contact form is fully functional and ready for your visitors. Add your contact us page in menu tab, so that users will know it.
Hope this post helped you on how to create contact form for Blogger and how to create contact page in Blogger. Share it if you found useful, Share your views in comments and subscribe to our RSS feeds.